Saturday, October 30, 2010

The Teeth


I used a sharpie and marked where I thought the teeth would fit, then cut the fiberglass underskull accordingly. The clay I am using is Super Sculpey.


After I had a basic set of teeth that I was ok with (and I mean ok.. because I will likely replace these teeth with a more anatomically correct version later) I hardened the sculpey with a hot air gun and prepared it for molding. 

The mold below is Smooth-On OoMoo.


Resin curing in the mold, with the sculpey master on top.


My airbrush was having major issues. I think the paint was just too old to use, so I used a brush instead. I drilled holes and mounted the teeth with small hex bolts with self locking nuts.


Next: Lip Mechanism!


Friday, October 29, 2010

Casting the Face

This is the finished fiberglass mold. I trimmed and sanded the edges.


Below you can see the inside negative. 


With a little sunlight:

A little damage. The mold cracked a bit when I was prying it apart with my wedges, but then while walking down the stairs, I tripped over the cat and dropped the mold to the ground. After a little bondo, it was as good as new.


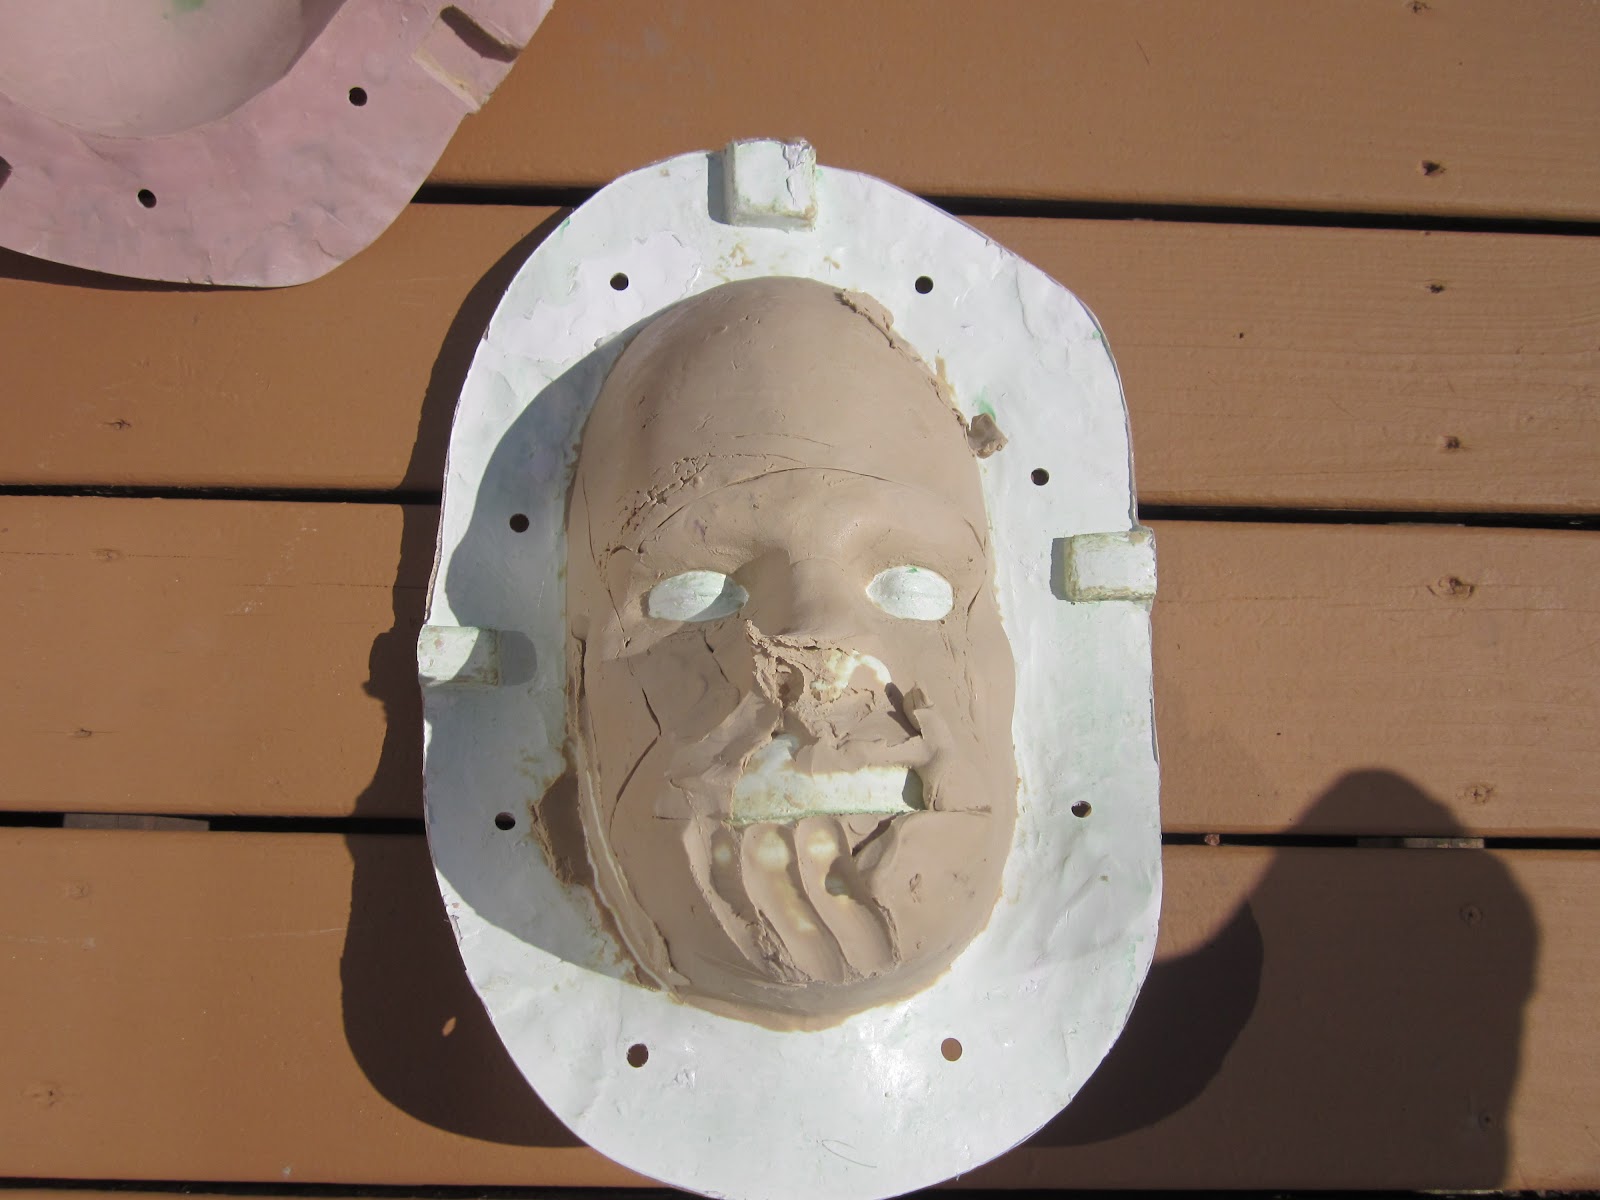
Basically what I am trying to do is make a two part fiberglass mold that will be injected with silicone. In order to get a proper thickness that I wanted the mask to have, I needed to lay in a 1/4" bed of clay. I used Klean Klay. Below is the negative image. It's hard to tell if its negative or positive, but the shadows help.


I didn't take any photos of the fiberglass process, but once the clay was ready, I layered some glass on top of it. I drilled a few holes before taking it apart.


Even though I used a good mold release and Partall #10 the Klean Klay was heated by the curing and became diffucult to remove. The PVA also seemed to bond to the fiberglass shell and soaking it in water wasn't working to get it to remove.


I ended up having to scrape the entire surface with a metal tool, then scrub it clean. It took forever. Really annoying.

After the clay was removed, I drilled ventilation holes, then bolted the halves together. My injection syringe was originally an oil suction gun that I found at Harbour Freight. It worked perfectly.


As the silicone (tinted black) was injected, the air holes started leaking, and were plugged with clay. This method helps eliminate trapped air inside the mold. The silicone pushes it all out the holes.


The syringe was hot glued to a hole where the mouth will be, then I propped it up with some clay so it wouldn't fall and rip the hot glue off.


After curing, it came out like this:


Then I used a Dremel with a multi-purpose bit and cut the underskull out. I realize this means I no longer have a complete mold, but this saved time and money. I hope I don't have to remake the mold anytime soon.


Next: The Teeth!


The Pants

Unfortunately I do not have any in progress photos, but my cats love sleeping on the pants.


The pants are held up with suspenders.


 Some of the hair is pulling out along the waistline. I think it has something to do with the way it rubs against the shirt. I will see if I can fix the problem so I don't have to latch hook every time I wear them.


Thursday, October 28, 2010

2 days to go

Costume finished. My back hurts from sitting in a chair for 12 hours. Photos/blog to follow soon. Still trying to get the hair to stay fixed on the mask. Smells like hair spray everywhere.

Sunday, October 24, 2010

5 days to go

Chewbacca mask 95% finished, going to watch Dexter with my wife. Feeling better about making my deadline. Pants are next.

Friday, October 22, 2010

8 days to go

Finished underskull and lip mechanism. Preparing to root the hair in the silicone mask, then attach the hood and latch hook that. o0

Wednesday, October 20, 2010

10 days to go

Finished the teeth. Still too busy to post images (or too lazy) but they turned out.. ok. Ok paint, ok, sculpt. lol I am making them removable so that I can replace them if I want to down the line.

Thursday, October 14, 2010

16 days to go

Silicone mask has been cast and painted, the underskull is 50% complete. Hair punching the mask and latch hook the pants will follow the mask. I'm working too hard to post more than this. Wish me luck!

Wednesday, October 6, 2010

24 days to go

The Halloween deadline is approaching fast, and I still have more to finish. I am still uncertain if I can finish in time, but I haven't given up hope yet. The face mold is complete and I am ready to build the underskull. I am re-mounting the boxes on the bandoliers, they will be more solid. The shirt is latch hooked and I am ready to start the pants.

Things to do in 3 weeks:

Fiberglass underskull
 -cutout out eyes and nose, form smooth edges
Sculpt teeth
Cast teeth
Paint teeth
Install teeth
Cast face
Paint face w/silicone paint system
Hair root face
Make mechanical jaw with lip snarl (this part can wait if I run out of time)
Latch hook pants
Make hood
 -latch hook and attach hood
Install mask attachment system (velcro)
Groom suit
Install snaps for sleeves-to-gloves attachment (still haven't found great gloves, but I will make do with the ones I found)


Ugh, I'm screwed.